"I’ve been looking for a natural and affordable solution for my skin, and this ACV toner sounds like a great…
Making Your Own Apple Cider Vinegar at Home
- Home
- Making Your Own Apple Cider Vinegar at Home
Making Your Own Apple Cider Vinegar at Home
Making Your Own Apple Cider Vinegar at Home: A Complete Step-by-Step Guide
Apple cider vinegar (ACV) is one of the most versatile ingredients in any kitchen. From salad dressings and marinades to home remedies and natural cleaning solutions, it serves a wide variety of purposes. While you can buy it at almost any grocery store, nothing beats the quality and satisfaction of making your own homemade apple cider vinegar. Not only is it cost-effective, but it also gives you full control over the ingredients and fermentation process.
In this comprehensive guide, you’ll learn everything you need to know about making your own apple cider vinegar at home—from gathering ingredients to bottling the final product.
Why Make Your Own Apple Cider Vinegar?
Before diving into the process, let’s explore a few compelling reasons why making apple cider vinegar at home is worth the effort:
1. Quality Control
Commercial vinegar often contains additives or preservatives. By making your own, you know exactly what’s going into your body.
2. Cost-Effective
Store-bought organic apple cider vinegar can be pricey. Homemade versions cost a fraction, especially if you’re using apple scraps.
3. Sustainability
Homemade ACV is a great way to reduce food waste. Use apple peels and cores instead of tossing them out.
4. Health Benefits
Homemade vinegar often contains “the mother” — strands of proteins, enzymes, and friendly bacteria thought to contribute to its health benefits.
What You’ll Need
Ingredients:
- Apple scraps (cores and peels) or whole apples (preferably organic)
- Sugar (white or raw cane sugar)
- Filtered water
Equipment:
- A large, clean glass jar or crock
- Cheesecloth or breathable fabric
- Rubber band or string
- Wooden spoon
Step-by-Step Guide to Making Homemade Apple Cider Vinegar
Step 1: Prepare Your Apples
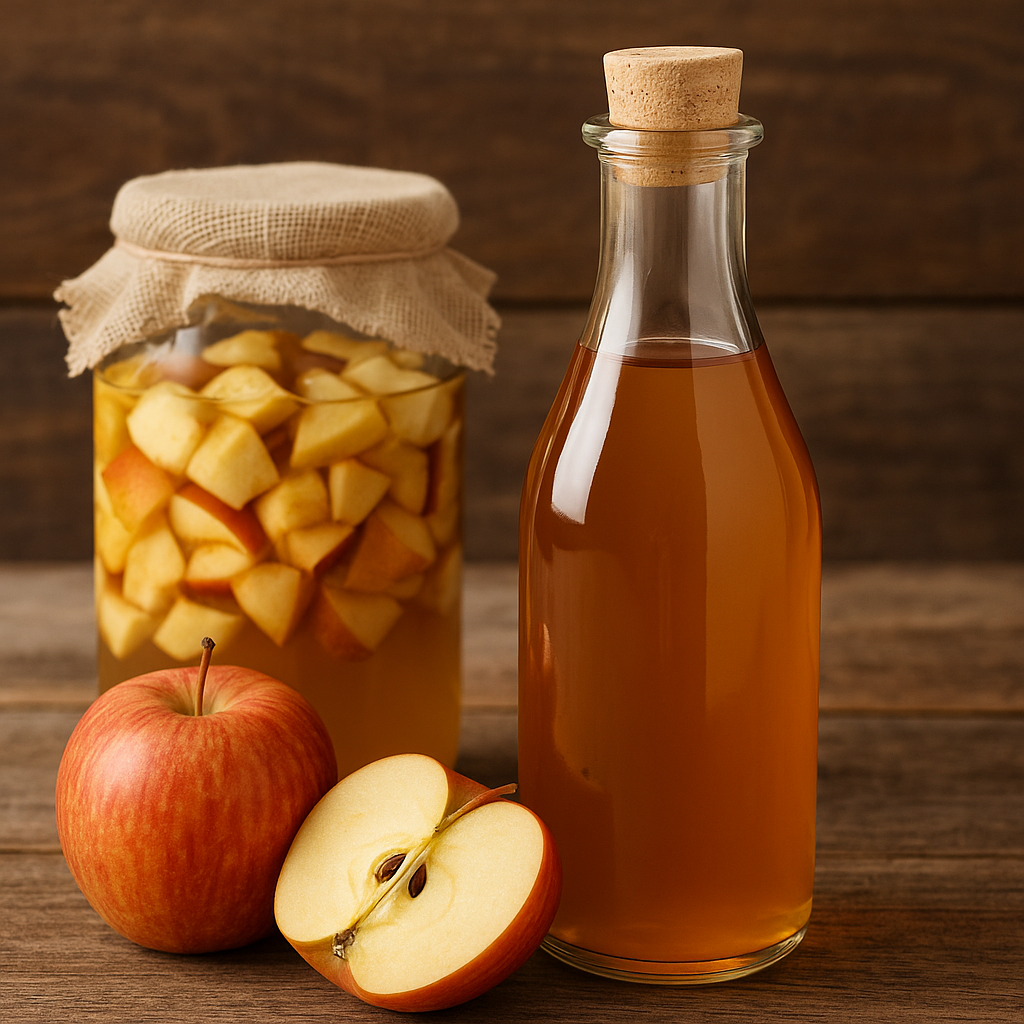
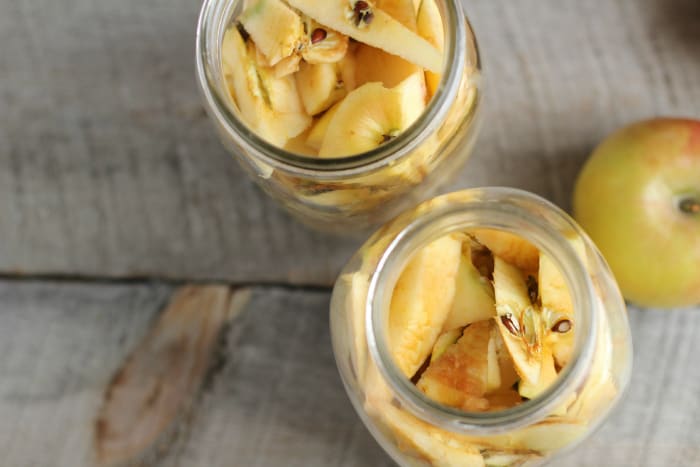
If you’re using apple scraps, collect enough to fill about ¾ of your glass jar. You can use apple peels, cores, or chopped apples. Ensure they’re clean and free of mold or bruises.
Tip: Organic apples are best because they don’t have pesticide residues that can interfere with fermentation.
Step 2: Add Sugar and Water
For every 1 cup of water, add 1 tablespoon of sugar. This sugar is essential as it feeds the natural yeast and bacteria that cause fermentation.
- Dissolve the sugar in filtered water.
- Pour the sugar-water mixture over the apples until they’re fully submerged.
Note: Avoid using tap water that contains chlorine, as it can kill the beneficial bacteria.
Step 3: Cover and Ferment
- Cover the jar with cheesecloth or a breathable fabric.
- Secure it with a rubber band.
- Store the jar in a dark, warm place (60–80°F / 16–27°C) for 2–3 weeks.
Stir the mixture once a day to prevent mold from forming on the surface. If mold appears, remove it immediately. A little white scum is normal; black or green mold is not.
Stage 2: Alcoholic Fermentation
After about 2–3 weeks, you should notice bubbles forming and a slightly alcoholic smell. This indicates that wild yeast is converting the sugars into alcohol, turning your mixture into hard apple cider.
- Strain out the apple solids and return the liquid to the jar.
- Cover again with the cloth and store it for another 3–4 weeks.
During this time, the alcohol will convert into acetic acid, which gives vinegar its distinctive tang.
Stage 3: Maturation
Around the 6-week mark, start tasting the vinegar. If it tastes like vinegar and smells acidic, it’s ready. If it still tastes like cider, let it ferment for another week or two.
Once you’re satisfied with the flavor:
- Strain the vinegar again.
- Bottle it in clean glass containers.
- Store in a cool, dark place.
Your homemade apple cider vinegar will continue to age and develop deeper flavors over time.
What is “The Mother” in Apple Cider Vinegar?
You might notice cloudy sediment at the bottom of your homemade ACV. This is called “the mother” and it’s full of beneficial bacteria and enzymes.
Many commercial brands remove or pasteurize the mother, but it’s completely safe—and even healthy—to consume. In fact, it’s a sign your vinegar is raw and alive.
Flavor Variations
One of the perks of making your own apple cider vinegar is the ability to experiment with flavors. Here are some fun ideas:
- Add herbs like rosemary or thyme during the second fermentation.
- Infuse spices like cinnamon, cloves, or ginger.
- Mix in other fruits like pears, plums, or berries to create unique vinegar blends.
Troubleshooting Common Issues
Mold on Top
This usually happens if the apples aren’t fully submerged or if the area isn’t clean. Always use clean jars and utensils, and keep everything submerged.
No Fermentation Activity
If you’re not seeing bubbles, your environment may be too cold or you may need to add more sugar to kickstart fermentation.
Vinegar Smells Off
If it smells putrid or rotten, discard it. A sour or sharp vinegar scent is normal, but anything foul is not.
How to Store Homemade Apple Cider Vinegar
Once fermentation is complete:
- Store vinegar in glass bottles with tight lids.
- Keep in a dark, cool cabinet or pantry.
- There’s no need to refrigerate it.
Properly stored, homemade vinegar can last indefinitely, though its flavor may evolve over time.
Uses for Homemade Apple Cider Vinegar
In the Kitchen
- Salad dressings
- Marinades
- Pickling vegetables
- Baking (as a leavening agent)
For Health
- Diluted in water as a digestive aid
- Gargle for sore throat
- Skin toner (with dilution)
In the Home
- All-purpose cleaner (mix with water and essential oils)
- Hair rinse for shine
- Fruit and vegetable wash
Nutritional and Health Benefits of Apple Cider Vinegar
Though more research is needed, many people use apple cider vinegar for its potential health benefits:
- Supports digestion
- May help regulate blood sugar
- Contains antimicrobial properties
- Rich in probiotics (especially if unfiltered)
- Helps with weight management when included in a balanced diet
Always consult with a healthcare provider before using vinegar as a supplement, especially if you’re on medication or have existing conditions.
Final Thoughts: Is It Worth Making Your Own Apple Cider Vinegar?
Absolutely. Making homemade apple cider vinegar is easy, affordable, and rewarding. With just a few ingredients and some patience, you’ll end up with a delicious, healthful vinegar you can use in a multitude of ways.
Whether you’re trying to reduce food waste, create a gut-friendly product, or simply explore home fermentation, this is a perfect DIY project to try.
FAQs About Homemade Apple Cider Vinegar
1. Can I use any kind of apple?
Yes, but a mix of sweet and tart apples provides a well-balanced vinegar.
2. Do I have to use sugar?
Yes, it’s essential for fermentation. Most of the sugar gets consumed in the process.
3. Can I speed up the fermentation?
Using a starter like raw ACV with the mother can help, but patience yields the best results.
4. How do I know if it’s safe to use?
As long as it doesn’t smell rotten and shows no signs of harmful mold, it’s safe. The acidic environment inhibits most pathogens.
If you’re ready to take control of your pantry staples and reap the rewards of fermentation, start making your own apple cider vinegar today. It’s a fun and fulfilling kitchen experiment that pays off in both flavor and functionality.
Check more DIY Products
Too lazy to do that you can try apple cider vinegar gummies
- Share
Dailyacv
Recent Comments
Thanks you for advise I will try that